How To Replace 3M™ Versaflo™ M-Series Lens, Faceshield & Face Seal

How To Replace 3M™ Versaflo™ M-Series Lens, Faceshield & Face Seal
C.W. Hayden Co. How To Series
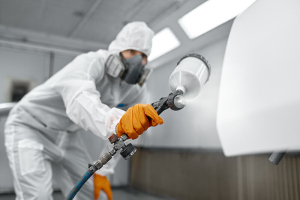
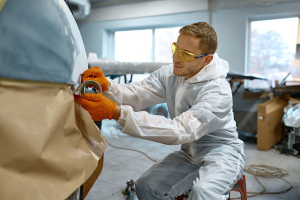
How to replace critical Versaflo parts on the 3MTM M-Series helmets, headgear or hardhats. From the entire face shield or “lens” as many in the industry call it, to the face seal gasket and outer shroud, below we will outline the step by step process on how to properly & safely install these essential replaceable parts using a TR300 Full Face Respirator. These products, as well as the other 3MTM Versa flow powered air purifying respirators, also use loose fitting hoods, which is a disposable item for when the headpiece is in such a condition where it is dirty or unusable.
Step 1:
To replace your face seal you'll have to first get your replacement parts ready to go. The seal for the demonstration. Is a M935.

Step 2:
Start by removing the face seal. There's an elastic band that wraps around connected to a small T, which the plastic device connects onto.

Step 3:
Disconnect one side which slides into the bottom of the face shield. Same for the other side, disconnect and remove from the T.

Step 4:
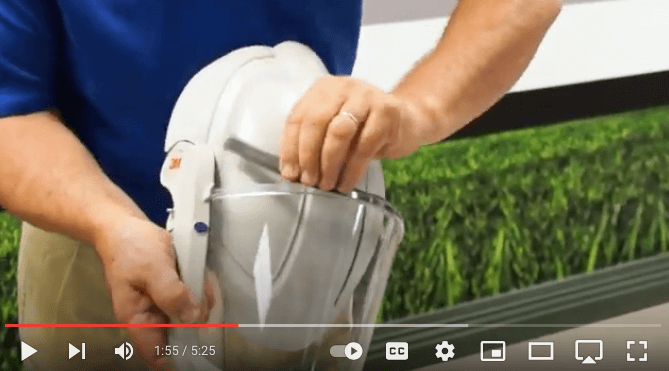
We then proceed to take the rim off first. This is the seal that when you close your face shield when in use, its job is to stop dust from coming down though the top.
Step 5:
These two buttons on the side of the helmet push out, and your face shield will then slide right out.

Step 6:
Next you want to slide your new lens into the channel, sliding in from the top. Make sure your lens goes into the channel. Slide your blue buttons in and snap them tightly into place.

Step 7:
Replace your dust guard.

Step 8:
Replace your shroud making sure to have the pull-out tab facing the inside for when you are wearing the mask and want to set the face shield down. Insert the seal right around the bottom making sure its evenly dispersed. Once inserted, give it a once over, making sure it seems nice and tight.

Step 9:
Again you'll see the T, make sure the seal is in securely and the elastic goes back over the plastic. Repeat on the other side.

Step 10:
Once you have all your headgear reassembled and ready to go, attach it to your PAPR. Whether you have the TR 300 or TR 600 it should be properly placed in the small of your back like so. Make sure it's not on your butt, and if it's in the middle of your shoulders it should be on a backpack. Attach the airline to your headgear and then you're good to go!

Find all your 3M™ Versaflo parts, units & filters on the C.W Hayden website with fast shipping: click here.
To watch 3M™ Product Expert Steve Bannister take you through the Step by Step process on YouTube, click here to watch.