Sanding Made Simple: 5 Pro Tips to Enhance Any Sanding Effort

Sanding Made Simple: 5 Pro Tips to Enhance Any Sanding Effort
Industrial sanding applications are wide-ranging and require specific tools for the job, which can make this a complex operation. Without the right approach, you run the risk of ruining your materials and riding your production schedule off the rails. Based on the surface material at hand—whether it be metal, composites or wood—there's a myriad of factors to consider to ensure you're optimizing the effort, minimizing time and maximizing results. Having the benefit of expert tips and insights to help guide the process gives you a leg up toward simplifying this work.
After all, sanding is about so much more than just connecting an abrasive to the surface and running it to completion. There are recommendations and best practices, and you want to employ the smartest, most effective products for the job. To that end, here are five valuable pro tips to make the job simpler and enhance any sanding effort in your area of industry.
1. Find the best abrasive disc for the job.
Certain types of abrasives work better on different types of surfaces. Because each sanding surface and application requires a specific kind of disc to do the job well and efficiently, it's important to match the correct disc to the corresponding job.
In the equipment, metal fabrication, construction and transportation industries, metal sanding applications often include stock removal, light weld blending and paint preparation of metal surfaces from carbon steel to aluminum. In these cases, your choice of abrasive discs will fall into one or more of the following categories:
- All-Purpose: for deburring, removing discoloration or preparing the surface for painting, as well as the intermediate sanding steps of surface preparation
- Aggressive: for completing burr and weld removal as well as finishing
- Edges & Corners: for durably handling sharp corners and edges while still providing a fast cut rate
In the marine, transportation, solid surface and energy industries, composites and coatings applications often include sanding on composite surfaces, fine-sanding coatings such as gel coat or paint, removing coatings and stripping paint. To choose the right disc, it's necessary to decipher between:
- All-Purpose: for removing sanding marks, removing coatings or retouching a coating, as well as the intermediate sanding steps of surface preparation
- Finishing: for surface finishing with gel coat applications
- Edges & Corners: for durably handling corners and edges while still providing flexibility
In the furniture, cabinetry and millwork industries, wood sanding applications often include stock removal, blending and finishing on solid wood and wood-based materials. Disc selection for these functions is based on the following needs:
- All-Purpose: for removing sanding marks or preparing a surface for painting, as well as the intermediate sanding steps of surface preparation
- Fine Finish: for preparing the surface for staining or creating a high-quality final smooth surface
- Edges & Corners: for durably handling corners and edges while still providing flexibility
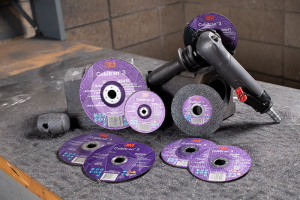
To meet the varying needs listed above, consider starting with some of the the following 3M™ Cubitron™ II discs for your sanding applications:
- When consistent finish is critical, start with the film-backed 775L
- For general purpose sanding, start with the paper-backed 732U
- If a heavy-duty disc for stock removal is needed, start with the cloth-backed 784F
Depending on the job, it may also be essential to choose abrasive discs that minimize dust. Why does this matter? Simply put, discs cut and last longer when dust isn't loading the cutting surface.
To accommodate this factor, 3M offers proprietary, precise multi-hole disc patterns that evacuate dust better than five- or six-hole products, dramatically increasing disc life and cut rate. The open-weave net structure of the 3M Xtract™ line of sanding discs enables the abrasive to put every created dust particle near a dust extraction hole. As you sand, dust is pulled through the mesh surface of a 3M Xtract™ sanding disc and into a backing pad that is continuously being ventilated through a vacuum exhaust system. The unique hole pattern available only from 3M supports up to 99% dust extraction plus an industry-leading cut rate, and it's designed to require less pressure.
2. Match the abrasive disc with the right back-up pad.
To enhance sanding performance, it's not only necessary to pair the best disc with the job at hand, but also to have the right match-up between disc and back-up pad. These components should work cohesively to achieve the best possible sanding results. Here's a basic breakdown of back-up pad profiles for applying to your abrasive disc and sanding application:
- For more aggressive sanding applications, go to the low-profile design back-up pad.
- For general purpose sanding applications, start with the standard design back-up pad.
- If a more conformable back-up pad is required, try the low-profile finishing design.
3. Choose the random orbital sander based on your dust extraction needs.
With the disc and pad needs identified, it's essential to opt for a random orbital sander that can meet your demands for dust extraction. Some applications will create greater amounts of dust, and it's important to manage those with optimal extraction features to support a cleaner, more productive workspace as well as high-quality sanding results.
- For optimal dust extraction, use a self-generated vacuum sander paired with the 3M Xtract™ Clean Sanding System
- If a central vacuum system is in place, use a central-vacuum-ready sander like the 3M™ Elite Central-Vacuum-Ready Random Orbital Sander.
- If dust extraction is not preferred, use a non-vacuum sander like the 3M™ Elite Non-Vacuum Random Orbital Sander.
4. Select the orbit pattern based on finish and cut requirements.
Getting the best results from your sanding involves selecting the right orbit diameter for your sander to accommodate your particular finish in the fine-to-course range.
When working on a project that requires fine finishing, you want to use a 3/32" diameter orbit. The 3/32" orbit is best for feathering paint or sanding between coats of finish because you can move around pretty freely without worrying about cutting through. Don't use this sander with anything coarser than 120 grit in a production operation, as doing so is very time-intensive and doesn't deliver the results you need.
The most commonly used orbit diameter falls in the medium to fine grit range of 80-400. It's best suited to the 3/16" diameter orbit. This action is smoother with good stock removal and gives you a decent finishing capability. Most hand sanding falls in the medium-size orbit range. Finishing wood leaves a stainable scratch starting at 180-220 grit, while buffing paints or gel coats can start after finishing with 800 grit.
When your project calls for extreme heavy-duty removal on wood or composites, you can use a 5/16" diameter orbit or even a 3/8" diameter orbit. You should also choose a coarse abrasive between 40 to 100 grit. Remember, this requires a firm hand to keep the sander from moving around. Apply firm downward pressure to ensure you're fully engaging the sanding on the surface.
5. Remember to start on, stop off.
The last pro tip here is a simple rule of thumb to prevent unnecessary swirl marks on the work surface. Make sure the sander is already placed on the work surface before starting it up, and then stop the tool as it is being removed from the work surface. For the best results, it is also recommended to operate your tool at 90 PSI air pressure.
For detailed information about how 3M's sanding line can support your industrial sanding efforts, visit our product pages or reach out to our team of experts.